
Yes, I have made quite a few of these for Christmas already. I have not yet made any fancy accessories (like the blanket, sleeping bag, or apron to hold them in, but I still might. I haven't decided!) and they were fun and easy to make. My 8 year old helped me out as well.
So, even though it's not an original idea by me, I'm going to show you how I made them in case you want to give some as gifts this year as well.
First, order the dolls. I bought mine from Casey's Wood Product but I've been told Dick Blick sotres carry them as might some other craft stores locally that you can buy them from.
1. Assemble supplies:
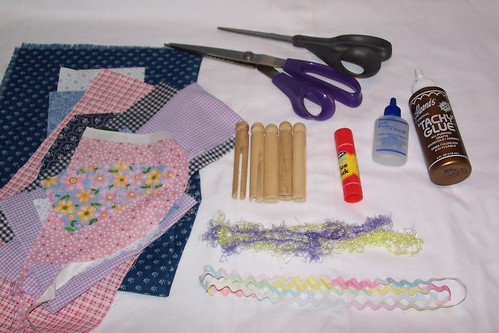
Doll pins
scissors
fabric scraps (or buy fat quarters from the local fabric store. These usually run 1-2 dollars each and one will help dress up quite a few dolls!)
ribbon (optional)
glue stick
tacky glue (optional)
fray check (optional)
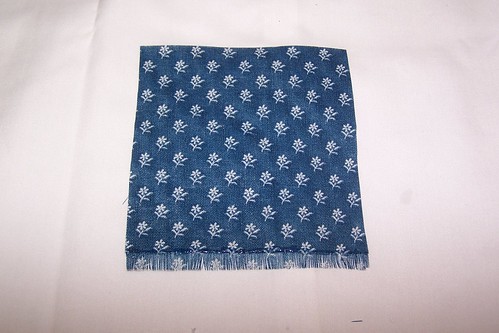
2. Pick out fabric for doll and cut to size. I wish I could give you measurements, but I didn't measure. I eyeballed and cut as I went. I am not even beneath admitting that I cut some of the fabric as I wrapped it around the doll, even with glue on it already!
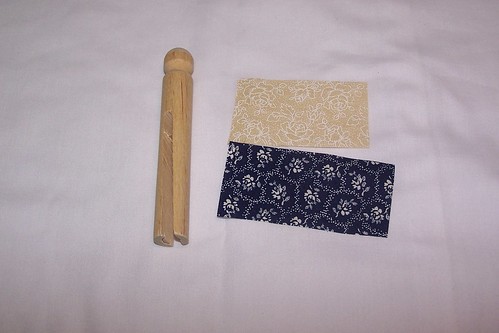
My shirt and skirt ready to go for this girl ...
(The optional step here is to apply fray check to your fabric squares if you are worried about that. I did not use it for this doll. In fact the only time I used it, was when I purposefully frayed one edge for a decorative touch and didn't want it to fray further)
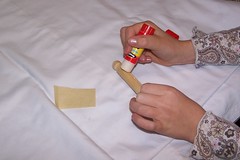
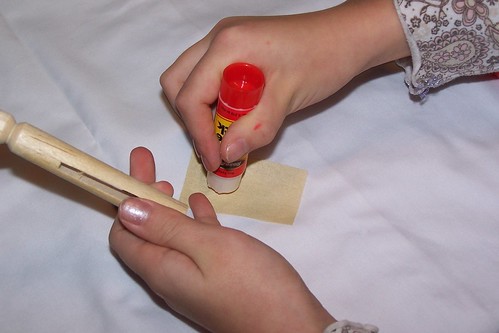
3. Apply glue to both pin and fabric. A plain old glue stick works fine for this step.
4. Wrap fabric around the doll. It doesn't matter if you put the top on first or the bottom on first ... it kind of depends on what look you are trying to achieve or what is easiest for you. I found it was easier to put the top on first because you can line it very straight with the top edge and that helps put the skirt on. However, if you put the skirt on first and it is a little crooked, well the top will hang over it and hide it anyway! So either way, you win in my opinion! LOL!
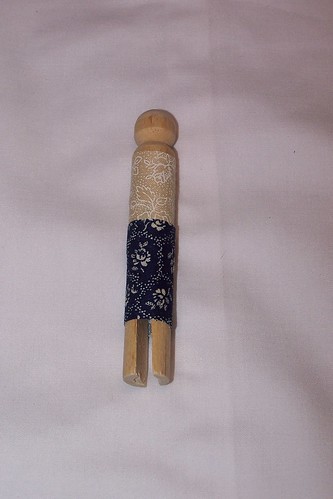
5. Get creative ... make a dress instead ... like this one (which, by the way, is the one I purposefully frayed the bottom of)
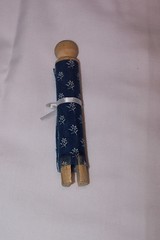
Add ribbons as belts. Cut the edges with pinking shears as a decorative touch. Really, you can't do anything wrong.
Here are mine so far ... my girls love them all and even my little guy keeps stealing them to play with!
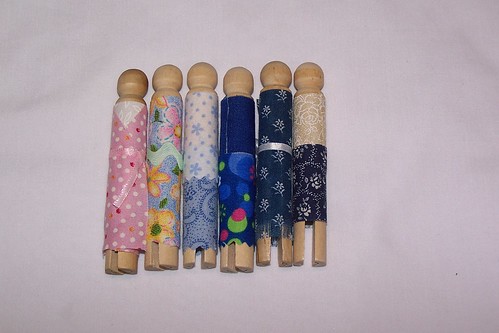
Although, you might notice, they are faceless so far. I haven't added the faces yet. I'm very nervous to do so. In the future I will add the face first before "dressing" them, in case the face gets messed up a bit. I bought the pens to draw the faces on (a permanent fine marker works best so I've read). When I get brave enough to color in faces, I will take photographs again. My son (who will be 2 next week and no, I can't believe he will be 2 already!!) is quite concerned about their missing faces. Sometimes when playing with them he pauses, looks at me and says "eyes? eyes?" and looks at the empty face. LOL!
Anyway, one idea that I believe anyone can do and it will make a great gift. Trust me. These are going to a relative, but all three of my children are jealous she is getting them Of course, they don't know I'm making them some for Christmas morning as well! But they will find out soon enough! =)
Those are adorable! We used to make them when I was a kid! Thanks for the reminder!
ReplyDeleteHow cute!!
ReplyDelete