
Not too terribly long ago my mom gave me her Cricut machine (why yes I am spoiled by her!)
I haven't had much of a chance to use it. When we first got it the girls and I played around and they made a few things - my 10 year old is actually pretty good at using it!
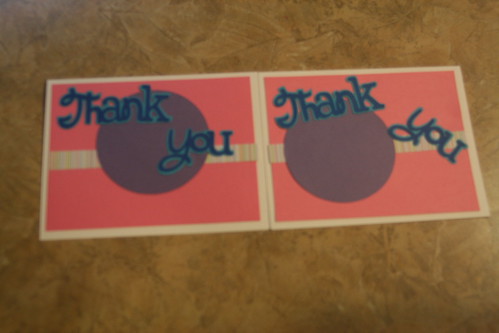
Anyway, with the 8yo's birthday recently, we decided we should whip up some thank you cards and this is what we decided on
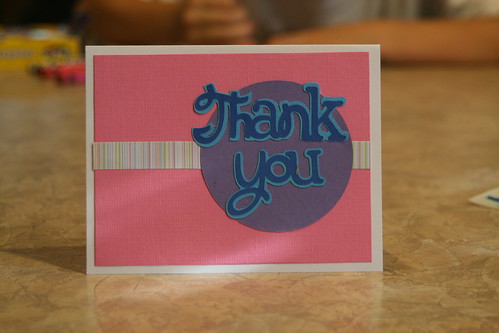
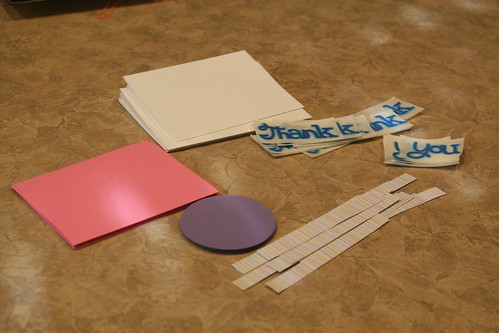
Cute isn't? Well, we thought so! Anyway, last night I stayed up getting all the parts ready for her to make them herself.
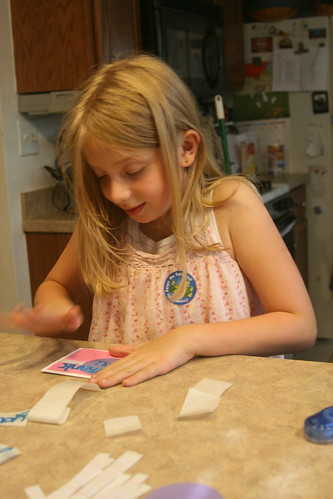
And so this afternoon she worked on them (and also, loved it and felt so special to get to use the tape LOL!)
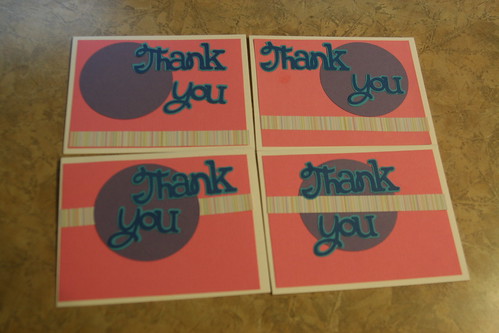
I gave her the pieces and even though we had the one card we made, I told her to feel free to make some changes if she wanted to. Here are all her finished cards - each one is a little (and sometimes a lot) different and I LOVE them all!

Just for fun, I'll share how we made them in case you want to whip a few up too!
Materials:
1 sheet 8 1/2x 11" each of purple, blue, and light blue cardstock
1 - 8 1/2" x 5 1/2 white cardstck (folded in half to make a card)
1 - 5 1/8" x 3 7/8 pink cardstock
1 - 5 1/8" x 1/2" stripped paper (I think ribbon would be very lovely too, but we didn't have any to use!)
Sweethearts Cricut cartridge
Simply Sweet Cricut cartridge (or a circle cutter!)
scissors and/or paper trimmer
adhesive
1. Using Sweethearts cartridge - cut out 1 - 2 1/4" Thank You on the blue cardstock (this is the shift of the honeymoon image.
2. Again with the sweethearts cartridge - cut out 1 - 2 1/4" shadow thank you from the light blue cardstock. (So you need to hit shift, shadow, to get this!)
3. Using Simple Sweet cartridge - cut out 1 - 2 1/2" shadow circle on the purple cardstock (to get this you hit shift, shadow, ). If you don't have this cartridge you can cut out a circle any way. I measured, the diameter is about 2 7/8.
Okay, now all the pieces are ready to go - you just have to assemble! At this point I ran both thank's and you's through my xyron machine because it just seemed the easiest way! I then put the thank you on top of the shadow pieces and set that aside (*note I did all of this for my daughter because I thought that might be a bit tougher for her to do!)
Then I put the striped paper (or ribbon if you are using that) on the pink cardstock. Then the circle followed by the thank and you. Then I taped all of that to card.
I hope that made sense - it's so much easier for me to do it then try to type up directions! So if something doesn't make sense, please let me know and I'll try to clarify it!
No comments:
Post a Comment
Seeing your comments makes me smile! Thank you so much =)